

Introduction
JIRA is one of those tools that the tech community continues to use as an example of “bad” software — a label synonymous with the tool for over a decade. Over the past few years, there have been significant architectural changes, improving performance, usability and reliability of the platform. This comes with more features built into the core of the platform, requiring less plugins and 3rd-party add-on’s.
Some of these changes within the platform include automations, which trigger actions based on searchable criteria in an easy to use, scratch-like, interface. There are a few ways that your team can blend custom fields, transitions and automations to really customize your experience to the needs of your team.
Let’s get started!
Improving Your Teams’ Effectiveness
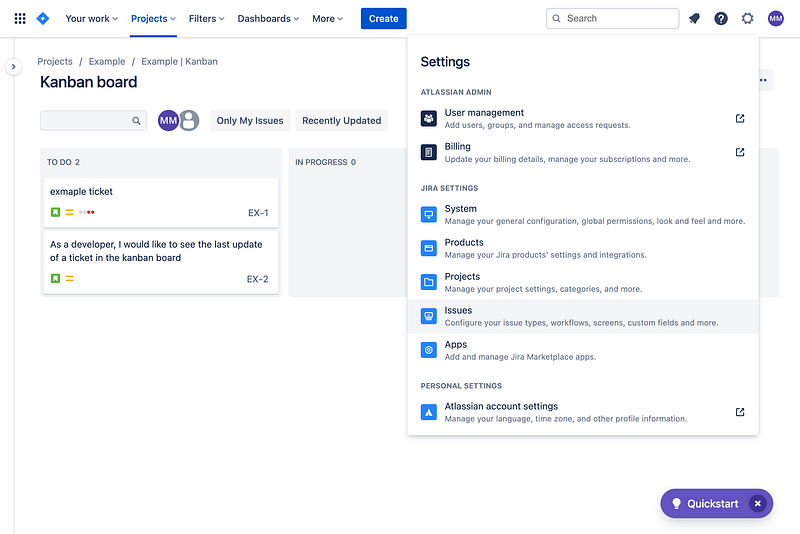
Issue boards are very effective for planning work, sharing status and driving alignment. Task-level let the team and contributors see the status of tasks, and transition them easily, with minimal effort and little interruption to their workflow. It’s simple on purpose, similar to the old sticky-note method.
Note: While we are using a Kanban board below, the same works for Scrum boards as well.

By adding the last comment, you can quickly assert the last person who contributed to the task and their update. For some organizations this works great, but others might want to leave off the comment author from the task to save some horizontal space in the preview.

Making the Change
There are not many steps required to implement this change, and it’s possible even if you do not have a lot of JIRA experience. The great this about this pattern, is that you can do the same for almost any action that occurs within JIRA, to surface more data to the teams that need it.
Note: To get started, you will need the JIRA administrator role, this includes the ability to create a custom field, and add project automations.
First, we will navigate to the Admin > Issues settings section.
Next, in the left navigation bar, select Custom Fields. We are going to add a new custom field to hold the value, so it’s available to the board.

We selected Paragraph specifically for the new custom field because a comment is longer than short text. Depending on the field you choose to implement, you always want to use the appropriate data type.

Next, we select a name for the custom field. We chose Last Comment for this one.

Depending on your setup, this next step in the wizard will ask you which screens should include the field. For older installs with a lot of customizations, this might be the most difficult part for you. For our example, we are going to choose EX: Scrum Default Issue Screen and EX: Scrum Bug Screen.

Now that our field was created and added to a screen, which means it’s now a presentable and editable field on our issue, we are going to create the automation.
Within your project, navigate to Project Settings > Automation.
Create a new automation and set the trigger to Issue commented. You will notice that the field Comment Type takes 3 possible values, add all of them.
This allows the automation to run regardless of the intent of the issue comment, such as if its part of the resolution screen popup, changing status, or on the ticket itself.

Next, we are going to add an action. We are going to select Edit issue fields and select the new Last Comment field.

The next step is the magic, the value we are going to add is going to be the following string:{{issue.comment.last.author.displayName}}: {{issue.comment.last.body}}
It will look like this within JIRA:

The displayName field returns the human readable value of the user, vs the accountID which is the default unique key. Also, the last.body value is the full comment that was provided, so we are going to need that as well.
Almost there!
Next, we are going to add a name to the automation, which we will call EX: Update Last Comment . In my experience, using the project key as a prefix makes it easy to inventory and manage automations.

Lastly, we need to navigate to the board configuration page, where we will edit the Card Layout. Search for the Last Comment field, and add it to the card layout.

When you navigate back to the board, you’ll see the new field displayed. If you hover over, a popup will appear to show the larger update.
Conclusion
This is just one example how you can grow your teams effectiveness. Think about all the other types of information each Driving alignment is everyone’s responsibility, and updates are a great way to hold the team accountable.
As a next step, try adding a Last Comment Date and Last Comment Author custom field on your own, and have all 3 show on the card! Be sure to think about the right data types like date/time and user picker fields for the correct field and how JIRA presents the data in different ways!
Member discussion